My Sites

Forums


Monday, June 29, 2015
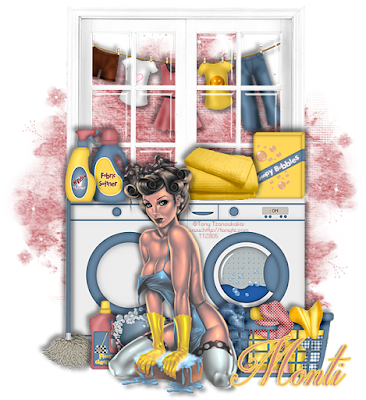
Monti's Scraps ~ Naughty Housewife
Supplies:
Program: Photoshop Elements 9 (other versions may work) and PSP X5
Tube of choice: Housewife by Tony Tzanoukakis. You must have a license to use his tubes.
PTU Kit: Clean As A Whistle by Monti's Scraps
Open:
Paper 2
Dryer
FabricSoftner
FloorCleaner
LaundryBasketFull
Mop
Towels-Yellow
Paper 2
Dryer
FabricSoftner
FloorCleaner
LaundryBasketFull
Mop
Towels-Yellow
Washer
Window
Bucket
ClothesLine
WashingPowder
WindowCleaner
Tutorial:
New image --> 596 x 650 --> transparent
Paper 2: open --> paste--> apply mask
Dryer: re-size by 42% place towards the left --> enhance --> autosharpen --> add drop shadow
Washer: re-size by 42% place on the right side of the dyer --> enhance --> autosharpen --> add drop shadow
LaundryBasketFull: re-size by 36% --> place on right side in front of washer --> enhance --> autosharpen --> add drop shadow
Bucket: re-size 20% --> move to right side of the dryer --> enhance --> autosharpen --> add drop shadow
FloorCleaner: re-size 19% --> move to the left & behind the bucket --> enhance --> autosharpen --> add drop shadow
Mop: rotate about 20 degrees to the left --> re-size 45% --> move to the far right of the dryer by the edge --> enhance --> autosharpen --> add drop shadow
Tube: place in the center of the washer and dryer --> add drop shadow
WindowCleaner: re-size 20% --> place on top of the dryer on the left side --> enhance --> autosharpen --> add drop shadow
FabricSoftner: re-size 20% --> place on top of the dryer --> position behind the windowcleaner --> enhance --> autosharpen --> add drop shadow
Towels-Yellow: re-size 21% --> place on top of the washer to the left side --> enhance --> autosharpen --> add drop shadow
WashingPowder: re-size 18% --> place on top of the washer --> position to the right behind towels-yellow --> enhance --> autosharpen --> add drop shadow
Window: re-size 85% --> place behind washer & dryer --> position in the center --> enhance --> autosharpen --> add drop shadow
ClothesLine: re-size 47% --> place behind window --> position in the center --> enhance --> autosharpen --> add drop shadow
Dryer: re-size by 42% place towards the left --> enhance --> autosharpen --> add drop shadow
Washer: re-size by 42% place on the right side of the dyer --> enhance --> autosharpen --> add drop shadow
LaundryBasketFull: re-size by 36% --> place on right side in front of washer --> enhance --> autosharpen --> add drop shadow
Bucket: re-size 20% --> move to right side of the dryer --> enhance --> autosharpen --> add drop shadow
FloorCleaner: re-size 19% --> move to the left & behind the bucket --> enhance --> autosharpen --> add drop shadow
Mop: rotate about 20 degrees to the left --> re-size 45% --> move to the far right of the dryer by the edge --> enhance --> autosharpen --> add drop shadow
Tube: place in the center of the washer and dryer --> add drop shadow
WindowCleaner: re-size 20% --> place on top of the dryer on the left side --> enhance --> autosharpen --> add drop shadow
FabricSoftner: re-size 20% --> place on top of the dryer --> position behind the windowcleaner --> enhance --> autosharpen --> add drop shadow
Towels-Yellow: re-size 21% --> place on top of the washer to the left side --> enhance --> autosharpen --> add drop shadow
WashingPowder: re-size 18% --> place on top of the washer --> position to the right behind towels-yellow --> enhance --> autosharpen --> add drop shadow
Window: re-size 85% --> place behind washer & dryer --> position in the center --> enhance --> autosharpen --> add drop shadow
ClothesLine: re-size 47% --> place behind window --> position in the center --> enhance --> autosharpen --> add drop shadow
Name:
-Photoshop Elements 9
-Font of choice (mine is Darleston so these settings work for my fonts. you may need to alter slightly for yours)
-layer --> layer style --> style settings
drop shadow: 0 deg angle; 4, 4, 75%; black
stroke: 2, 100, #fdd75b (yellow)
Add copyright and watermark
DONE

Friday, May 8, 2015
Mellie Beans ~ Mardi Gras
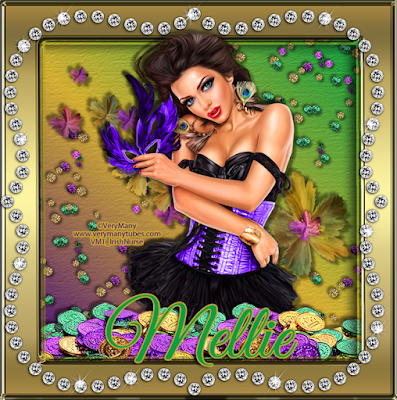
Supplies:
Program: Photoshop Elements 9 (other versions may work)
Tube of choice: Mask by VeryMany. You must have a license to use her tubes.
PTU Kit: Mardi Gras by MellieBeans at Heartbeatz Creationz or MusicalScraps
Font: Great Vibes
Open:
e35Tutorial:
e35: re-save in a different location and file name to avoid saving over the original frame
pp09: re-size to fit inside e35 (the frame)
e04: re-size 85% --> place above the e35 layer in the center --> use selection tool around the edges to delete any excess --> add drop shadow
e02: re-size 93% --> move to the right side above e04 layer --> duplicate --> move to the left --> merge two layers --> use selection tool around the edges to delete any excess --> add drop shadow
e27: rotate 112 deg left --> re-size 95% --> place above the e04 layer --> move to the center
tube of choice: re-size to your choice --> place in the center --> duplicate --> crop top layer so it looks like the head is over the frame and behind e02 --> crop bottom layer so there's no excess below the frame
Name:
-Photoshop Elements 9
-Font of choice (mine is Great Vibes so these settings work for my fonts. you may need to alter slightly for yours)
-layer --> layer style --> style settings
drop shadow: 30 deg angle; 5, 5, 75%; black
stroke: 2, 100, #cda92d
font color: #0d9f41
font color: #0d9f41
Add copyright and watermark
DONE
Thursday, May 7, 2015
Monti's Scraps ~ Coffee Addict

Supplies:
Program: Photoshop Elements 9 (other versions may work) and PSP X5
Tube of choice: Girl With Coffee by VeryMany. You must have a license to use her tubes.
PTU Kit: Coffee Addict by Monti's Scraps
Font: Great Vibes; Grad
Template: Template_96_Coffee from Dangerously Delicious Designz
Mask: Mask of choice
Template: Template_96_Coffee from Dangerously Delicious Designz
Mask: Mask of choice
Open:
Template 96
Template 96
Cafeteria
Clock-Purple
CoffeeBeans-CupFill
CoffeeBeans-Scattered
CreamJug-Brown
CupAndSaucer-Purple
IcedCoffee
Mug-Green
Mug-Green
SugarBowl-Cream
Teaspoon1
Paper 2
Paper 6
Paper 7
Paper 9
Paper 10
Paper 12
Paper 13
Paper 15
Tutorial:
Paper 2
Paper 6
Paper 7
Paper 9
Paper 10
Paper 12
Paper 13
Paper 15
Tutorial:
Template 96: delete info, wording, wording white with d/s, pink frames, black frames, white frames bgs, right and left pink squares, and right and left white squares
Paper 13: open --> paste over left white triangle on template--> re-size paper --> magic wand tool --> select --> ctrl+shift+I --> delete
Paper 9: open --> paste over blue white triangle --> re-size paper --> magic wand
tool --> select --> ctrl+shift+I --> delete
Paper 12: open --> paste over blue strip --> re-size paper --> magic wand
tool --> select --> ctrl+shift+I --> delete
Paper 7: open --> paste over right white triangle --> re-size paper --> magic wand
tool --> select --> ctrl+shift+I --> delete
Paper 6: open --> paste over right blue triangle --> re-size paper --> magic wand
tool --> select --> ctrl+shift+I --> delete
Paper 2: open --> paste over blue circle --> re-size paper --> magic wand
tool --> select --> ctrl+shift+I --> delete
Paper 10: open --> paste over black rectangle --> re-size paper --> magic wand
tool --> select --> ctrl+shift+I --> delete
Paper 15: open --> paste behind all template layers --> place mask
CoffeeBeans-Scattered: re-size 89% --> place above the layers of the template in the center
CoffeeBeans-CupFill: re-size 85% --> place above CoffeeBeans-Scattered layer --> move towards bottom portion of the scattered beans --> duplicate x7 --> hide 5 of the duplicate layers
1st duplicate: rotate 20 deg to the right --> place above the first cupfill and to the left slightly
2nd: rotate 20 deg to the right --> place above 1st duplicate and to the left more
3rd: rotate 17 deg to the left --> place above 2nd duplicate and to the right
4th: move to the upper left above the CoffeeBeans-Scattered layer
5th: move directly above the 2nd
6th: move above the 5th and down some
7th: move above the CoffeeBeans-Scattered to the upper right
Clock-Purple: re-size 50% --> place above the CoffeeBeans-Scattered and CoffeeBeans-CupFill plus the duplicates --> move to the left side in front of the left white triangle
Mug-Green: flip horizontal --> re-size 38% --> place above the Clock-Purple layer to the left --> using a font of your choice (similar to mine) type Coffee Addict separately --> add your style settings as you wish for your text
IcedCoffee: re-size 42% --> place above the blue strip layer --> move to the right and center
Cafeteria: re-size 33% -> place above the IcedCoffee element --> move to the right
CreamJug-Brown: re-size 52% --> place above the Cafeteria element --> move to the left while slightly overlapping the two
Tube of choice: re-size to your liking --> place in the center
SugarBowl-Cream: re-size 50% --> place above the Mug-Green element --> move towards the bottom of the mug
CupAndSaucer-Purple: re-size 30% --> place above the SugarBowl-Cream element --> move to the right
Teaspoon1: rotate --> flip horizontal --> re-size 50% --> place above all layers --> move between the SugarBowl-Cream element and the CupAndSaucer-Purple element
CoffeeBeans-CupFill: re-size 85% --> place above CoffeeBeans-Scattered layer --> move towards bottom portion of the scattered beans --> duplicate x7 --> hide 5 of the duplicate layers
1st duplicate: rotate 20 deg to the right --> place above the first cupfill and to the left slightly
2nd: rotate 20 deg to the right --> place above 1st duplicate and to the left more
3rd: rotate 17 deg to the left --> place above 2nd duplicate and to the right
4th: move to the upper left above the CoffeeBeans-Scattered layer
5th: move directly above the 2nd
6th: move above the 5th and down some
7th: move above the CoffeeBeans-Scattered to the upper right
Clock-Purple: re-size 50% --> place above the CoffeeBeans-Scattered and CoffeeBeans-CupFill plus the duplicates --> move to the left side in front of the left white triangle
Mug-Green: flip horizontal --> re-size 38% --> place above the Clock-Purple layer to the left --> using a font of your choice (similar to mine) type Coffee Addict separately --> add your style settings as you wish for your text
IcedCoffee: re-size 42% --> place above the blue strip layer --> move to the right and center
Cafeteria: re-size 33% -> place above the IcedCoffee element --> move to the right
CreamJug-Brown: re-size 52% --> place above the Cafeteria element --> move to the left while slightly overlapping the two
Tube of choice: re-size to your liking --> place in the center
SugarBowl-Cream: re-size 50% --> place above the Mug-Green element --> move towards the bottom of the mug
CupAndSaucer-Purple: re-size 30% --> place above the SugarBowl-Cream element --> move to the right
Teaspoon1: rotate --> flip horizontal --> re-size 50% --> place above all layers --> move between the SugarBowl-Cream element and the CupAndSaucer-Purple element
Add drop shadow to your liking (I used PSP X5)
Name:
-Photoshop Elements 9
-Font of choice (mine is Great Vibes so these settings work for my fonts. you may need to alter slightly for yours)
-layer --> layer style --> style settings
drop shadow: 30 deg angle; 4, 4, 75%; black
stroke: 2, 100, black
Add copyright and watermark
DONE
Wednesday, January 28, 2015
Rissa's Designs ~ Oceana
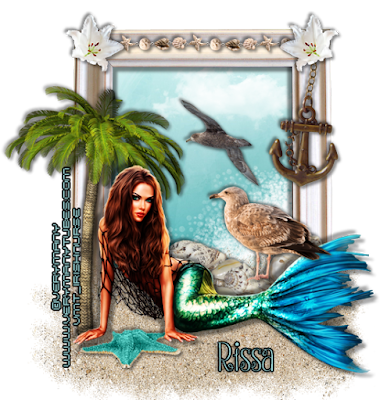
This tutorial is of my own creation and any resemblance, or likeness, to any other tut is purely coincidental. This tutorial is for personal use only; any use for monetary gain is illegal.
Supplies:
Program: Photoshop Elements 9 (other versions may work)
Tube of choice: Mermaid by VeryMany. You must have a license to use her tubes.
PTU Kit: Oceana by Rissa's Designs
Font: Strawberry Whipped Cream
Open:
RD_O_Paper14
RD_O_element32
RD_O_element6
RD_O_element10
RD_O_element11
RD_O_element36
RD_O_element41
RD_O_element46
RD_O_element52
RD_O_element59
RD_O_element73
RD_O_element77
RD_O_element78
Tutorial:
Create a new canvas ~ 521 x 549
RD_O_Paper14
RD_O_element32
RD_O_element6
RD_O_element10
RD_O_element11
RD_O_element36
RD_O_element41
RD_O_element46
RD_O_element52
RD_O_element59
RD_O_element73
RD_O_element77
RD_O_element78
Tutorial:
Create a new canvas ~ 521 x 549
RD_O_element32: paste onto new canvas
RD_O_Paper14: place behind frame and re-size to inside frame and crop if need be
RD_O_element77: re-size to 176 x 211 and crop out any that sticks past the frame --> place to the lower left inside the frame
RD_O_element52: re-size to206 x 99 --> place upper center of the tag
RD_O_element11: re-size to 120 x 130 --> place in center of the sky slightly overlapping element 52 (clouds)
RD_O_element77: re-size to 306 x 36 --> place on upper portion of the frame in the center
RD_O_element46: re-size to 476 x 144 --> duplicate x2 --> move all 3 layers where you want them (mine are above the frame and below the tube to make it look like she's laying on the sand some)
RD_O_element73: re-size to 152 x 68 --> place on bottom left of canvas
RD_O_element10: re-size 110 x 225 --> place on right side of frame (like a charm on a phone)
RD_O_element36: re-size to 93 x 92 --> place in the right upper corner of frame above the seashells over element10 (anchor) --> duplicate --> mirror --> place on the left corner of the frame
Tube of choice: re-size to your liking --> place in front of frame towards the bottom --> duplicate --> overlay on the duplicate layer
RD_O_element59: re-size 323 x 146 --> place behind tube --> make sure it's sticking out some
RD_O_element41: image --> rotate --> flip horizontal (or mirror) --> re-size 260 x 359 --> place on left side of frame behind the tube
RD_O_element6: re-size 181 x 143 --> place above tube on top of the seashells
RD_O_Paper14: place behind frame and re-size to inside frame and crop if need be
RD_O_element77: re-size to 176 x 211 and crop out any that sticks past the frame --> place to the lower left inside the frame
RD_O_element52: re-size to206 x 99 --> place upper center of the tag
RD_O_element11: re-size to 120 x 130 --> place in center of the sky slightly overlapping element 52 (clouds)
RD_O_element77: re-size to 306 x 36 --> place on upper portion of the frame in the center
RD_O_element46: re-size to 476 x 144 --> duplicate x2 --> move all 3 layers where you want them (mine are above the frame and below the tube to make it look like she's laying on the sand some)
RD_O_element73: re-size to 152 x 68 --> place on bottom left of canvas
RD_O_element10: re-size 110 x 225 --> place on right side of frame (like a charm on a phone)
RD_O_element36: re-size to 93 x 92 --> place in the right upper corner of frame above the seashells over element10 (anchor) --> duplicate --> mirror --> place on the left corner of the frame
Tube of choice: re-size to your liking --> place in front of frame towards the bottom --> duplicate --> overlay on the duplicate layer
RD_O_element59: re-size 323 x 146 --> place behind tube --> make sure it's sticking out some
RD_O_element41: image --> rotate --> flip horizontal (or mirror) --> re-size 260 x 359 --> place on left side of frame behind the tube
RD_O_element6: re-size 181 x 143 --> place above tube on top of the seashells
Add your tube of choice
Add drop shadow to your liking (I used PSP X5)
Name:
-Photoshop Elements 9
-Font of choice (mine is Strawberry Whipped Cream so these settings work for my font. you may need to alter slightly for yours)
-layer --> layer style --> style settings
drop shadow: 30 deg angle; 5, 5, 75%; black
stroke: 2, 100, black
Add copyright and watermark
DONE
Tuesday, January 27, 2015
Mellie Beans ~ Definitely Girlie, Definitely
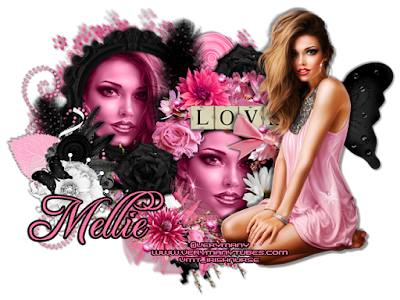
Supplies:
Program: Photoshop Elements 9 (other versions may work)
Tube of choice: Margaret by VeryMany. You must have a license to use her tubes.
PTU Kit: Definitely Girlie, Definitely by MellieBeans at Heartbeatz Creationz or Mystical Scraps
Open:
fr01
pp01
cluster01
e02
e34
e36
e37
e38
e40
e42
e48
e49
Tutorial:
Create a new canvas ~ 650 (w) x 488 (h)
fr01
pp01
cluster01
e02
e34
e36
e37
e38
e40
e42
e48
e49
Tutorial:
Create a new canvas ~ 650 (w) x 488 (h)
fr01: re-size 249 (w) x 246 (h) --> move to upper left --> duplicate --> move diagonally down to the right
pp01: magic wand tool --> select inside both frames --> select--> modify --> expand --> 5 pixels --> ctrl. + shift + I --> select the paper --> delete
tube of choice: mirror --> place above paper & behind frame --> select inside the frame on the left --> modify --> expand --> 5 pixels --> ctrl. + shift + I --> select the tube --> delete --> repeat for the other tube in the 2nd frame
e36: place behind frames and paper to the left
e40: re-size 156 (w) x 225 (h) --> place on the left frame to the left middle of the two frames
e02: re-size 97 (w) x 84 (h) --> place towards the bottom of e40 (feather)
e37: rotate --> custom --> 135 right --> re-size 139 (w) x 184 (h) --> place on right side of the right frame in the middle of the curve
e49: re-size 282 (w) x 215 (h) --> place on the top part of the right frame
e48: rotate --> custom --> 30 right --> re-size 311 (w) x 258 (h) --> place at the bottom of the right frame near e37
cluster01: rotate --> 90 deg left --> re-size 205 (w) x 307 (h) --> place to the bottom left of the left frame near e48
e38: re-size 114 (w) x 110 (h) --> place above the e48 layer and directly on top of the circle with secret written on it --> duplicate --> hide duplicate layer for now
tube of choice: re-size to your liking --> place on the right side of the tag --> filter --> xero --> radiance (use settings below or adjust to the way you want it)
e34: re-size 97 (w) x 94 (h) --> paste below the frames & to the right of the feather
e38: unhide duplicate layer --> move below the frames, above e34, & to the right some
e42: rotate --> custom --> 30 left --> re-size 189 (w) x 188 (h) --> place behind tube on upper back --> crop what you need for it too look like your tube has wings
Add drop shadow to your liking (I used PSP X5)
Name:
-Photoshop Elements 9
-Font of choice (mine is Freebooter Script so these settings work for my font. you may need to alter slightly for yours)
-layer --> layer style --> style settings
drop shadow: 30 deg angle; 3, 3, 75%; black
stroke: 3, 100, black
Add copyright and watermark
DONE
Saturday, July 19, 2014
New Blog Clothes!!
Thanks to me and artisteer, I was able to create a new blog layout :) This is much better than what I had before!!
Monday, June 23, 2014
FTU Tut - Purple Pleasures (Photoshop)

This tutorial is of my own creation and any resemblance, or likeness, to any other tut is purely coincidental. This tutorial is for personal use only; any use for monetary gain is illegal.
Supplies:
Program: Photoshop Elements 9 (other versions should work)
FTU Kit: Purple Pleasures by Gold Dust
Font: Admiration Pains
Kit Materials:
Frame4
Paper14
Bird3
Boots
Butterflies
Cat
Bench
Fence
Flower8
Flowers2
Grass
Sparkles
Tutorial:
-Open frame4 and press F12 to re-save it as something else to avoid saving over the actual frame.
-Open paper14 and paste onto tag --> re-size to your liking
-Open paper14 and paste onto tag --> re-size to your liking
-Open bench. image --> rotate --> flip horizontal then re-size by 43%. Place on tag behind the frame.
-Open cat. Re-size by 35% and rotate slightly to the left for the kitty to fit nicely on the bench. Place above the bench.
-Open grass. Paste on tag behind the bench and cat then duplicate. move the duplicate layer above the bench and cat --> move slightly up so it looks like the bench is sitting inside the grass. Click on the magic wand (in your panel on the side) --> select the frame --> click inside the frame --> selections --> select all --> modify --> expand --> 5 --> ctrl+shift+i --> press delete on both grass layers --> deselect.
-Open fence. Re-size by 32% and duplicate twice. Move one fence to the far left, one in the center, and one to the far right. Overlap each one so it looks like one fence then merge the 3 layers together.
-Open flower8. re-size by 25% --> place on tag behind the bench towards the left side of it
-Open boots. image --> rotate --> flip horizontal then re-size by 25%. place behind the frame above all the other layers
-Open bird3. re-size 20% and paste above the fence layer so it looks like it's standing there.
-Open sparkles. place onto tag above the paper layer then click on the magic wand (in your panel on the side) --> select the frame --> click inside the frame --> selections --> select all --> modify --> expand --> 5 --> ctrl+shift+i --> press delete
-Open butterflies. image --> rotate --> custom --> 25 deg right. re-size by 90%. place onto tag and duplicate then adjust the two layers to your liking --> merge the two layers
-Open flowers2. re-size by 52%. place above frame in upper right corner. rotate original flowers2 to 90 deg then image --> rotate --> 90 deg left --> place that layer in the upper left corner. rotate original flowers2 again 90 deg left and place that layer in the bottom left corner. rotate original flowers2 one more time 90 deg left and place it on the bottom right corner.
Add drop shadow to elements to your liking.
Name:
-Font of choice (mine is Admiration Pains so these settings work for my font. you may need to alter slightly for yours)
-layer --> layer style --> style settings
drop shadow: 30 deg angle; 5, 10, 75%; black
stroke: 1, 100, light purple (#af8fcf)
Add copyright (for the scrap kit) and watermark
DONE
Subscribe to:
Posts
(Atom)
My Blinkies